When a pipe bursts, you need to stop the water at the main valve and cut power to affected areas before anything else. Then you should document the damage and call a water mitigation company that can extract water, dry hidden moisture, and assess what can be saved. The next steps determine whether you’re dealing with a fast recovery or a larger structural problem.
Key Takeaways
- Shut off the main water supply, cut power to affected areas, and document damage with quick photos.
- Call a water mitigation company promptly and keep the area clear for safe access.
- Remove standing water using pumps or wet vacuums, then dry materials with air movers and dehumidifiers.
- Assess damaged materials for salvageability, and remove irreparable items to prevent mold and structural issues.
- Sanitize affected surfaces, monitor drying progress, and inspect for hidden moisture or odor within 48 hours.
Stop the Water and Cut the Power
The first step is to stop the water source immediately by shutting off the main supply valve or the nearest isolation valve to the burst pipe.
You then cut electrical power to affected areas at the breaker panel if water has reached outlets, appliances, or wiring. This prevents shock, equipment damage, and hidden arcing during the water mitigation process after burst pipe damage.
Use dry footwear, keep your hands clear of wet surfaces, and avoid standing in pooled water near energized circuits.
If you can’t verify the area’s safety, stay out and call a licensed electrician.
What to Do First After a Burst Pipe
Immediately after a burst pipe, your first move is to shut off the water at the main valve or the nearest isolation valve, then cut power to any affected area if water has reached outlets, appliances, or wiring.
Next, protect your household by moving people and pets away from the wet zone and wearing non-slip shoes. Then, document the damage with quick photos so you’ve got a clear record.
Move people and pets away from the wet zone, and document the damage with quick photos.
Confirm the water is fully off.
Check for active electrical hazards.
Begin removing small, portable items from the floor.
If you can do it safely, open nearby faucets to relieve residual pressure and reduce dripping.
Stay calm, act methodically, and focus on safety first; your fast response helps your home’s recovery start on the right footing.
Call a Water Mitigation Company
Once you’ve shut off the water and checked for immediate hazards, call a water mitigation company to start controlled drying and damage containment.
You’ll want a crew that can arrive quickly, assess moisture levels, and document the loss with calibrated meters and photos.
Give them the location of the burst, the materials affected, and any electrical or structural concerns.
When you speak with the dispatcher, ask about estimated arrival time, equipment availability, and what areas you should keep clear.
Stay available for access to the home, but avoid moving wet contents unless they block safe entry.
A qualified team helps you follow a clear plan, so you’re not handling every step alone.
Their guidance keeps the process organized and gives you confidence from the start.
How Water Mitigation Reduces Further Damage
By removing standing water quickly, using targeted airflow, and controlling humidity, water mitigation limits how far moisture spreads into flooring, drywall, framing, and contents. You reduce capillary wicking, slow microbial growth, and protect structural materials before secondary damage starts.
Your mitigation team also isolates affected zones, which helps keep damp air from migrating into clean areas and supports a coordinated response you can trust.
Your mitigation team isolates affected zones, preventing damp air from spreading and supporting a coordinated response you can trust.
Stabilize materials before they swell, delaminate, or stain.
Lower indoor humidity so hidden moisture dries more predictably.
Preserve salvageable belongings by limiting prolonged exposure.
When you act early, you join a process built to protect your property’s integrity and shorten recovery time.
Clear communication with your crew keeps priorities aligned and your space safer.
Remove Standing Water and Moisture
First, technicians extract standing water with pumps, wet vacuums, and truck-mounted equipment to stop moisture from spreading into subfloors, wall cavities, and insulation.
You’ll see them move methodically through each affected area, removing water from carpets, hard surfaces, and low spots before it can seep deeper. They also wipe visible moisture from trim, cabinets, and fixtures, then check for residual dampness on floors and base materials.
You should expect targeted moisture control, not guesswork; that’s how your property stays protected and your team stays on track. Crews may use absorbent pads and squeegees for tight spaces, keeping the site safe and organized.
Dry Walls, Floors, and Hidden Areas
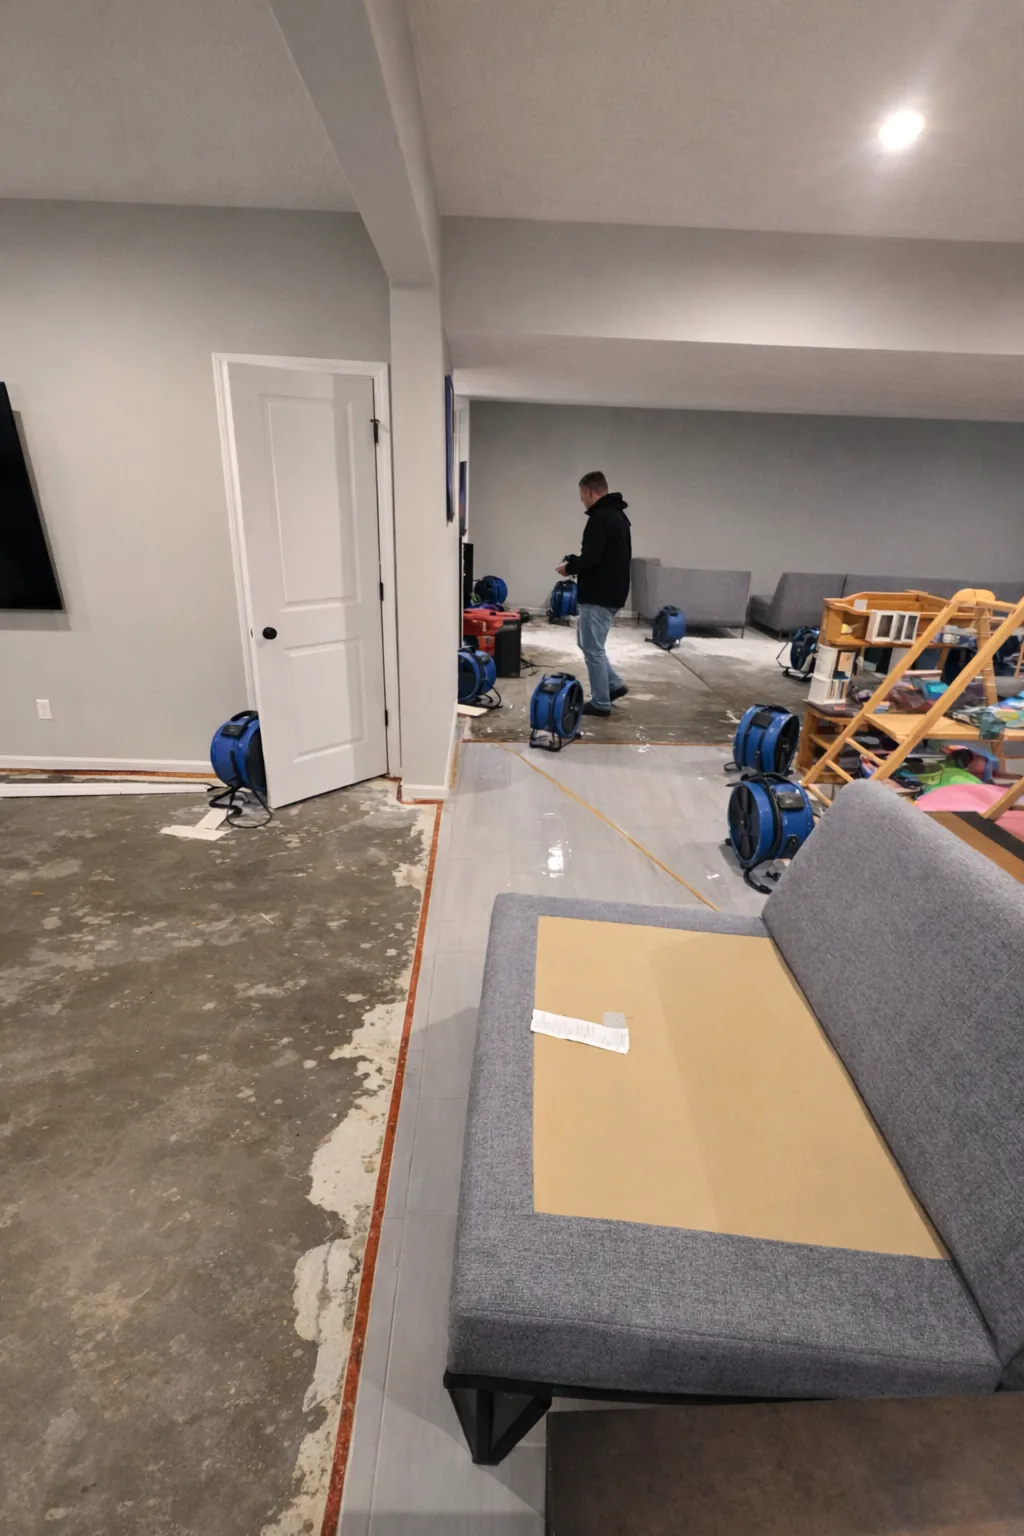
Technicians then set up air movers, dehumidifiers, and specialized drying equipment to pull moisture from walls, floors, and concealed cavities before it can cause warping, swelling, or mold growth.
You’ll want to keep pathways open so airflow reaches baseboards, wall studs, subfloors, and cabinet voids. Skilled crews map damp zones with moisture meters and adjust equipment until readings trend down consistently.
Position air movers to sweep across wet surfaces.
Run dehumidifiers to lower indoor humidity.
Verify hidden pockets dry through repeat checks.
You can stay confident when each area dries in sequence, because controlled drying limits lingering damage and helps your space return to normal faster.
Keep doors, vents, and access panels open unless technicians direct otherwise, so the whole team works together efficiently.
Check Which Materials Need Replacement
You’ll need to assess saturation levels in each affected material to decide what can be salvaged and what can’t.
Inspect structural materials like drywall, subflooring, and insulation for swelling, delamination, warping, or loss of integrity.
Remove any irreparable items immediately to prevent mold growth and further structural damage.
Assess Saturation Levels
After the initial extraction, professionals assess saturation levels to determine which materials can dry in place and which need removal. You’ll use moisture meters and thermal imaging to compare readings across walls, floors, and contents, then map wet zones to identify affected items.
Materials that stay above acceptable moisture thresholds after repeated checks usually require replacement, while recoverable materials can remain for controlled drying. Stay engaged with the process so you understand each decision and feel confident in the plan.
Measure each material separately for accurate moisture data.
Compare readings to unaffected areas for baseline confirmation.
Remove only items that can’t return to safe dryness.
Inspect Structural Materials
Next, professionals inspect structural materials to decide what can stay, what can dry, and what needs replacement. You’ll see them check studs, subflooring, joists, drywall, insulation, and framing connections for swelling, delamination, rust, and loss of strength.
They use moisture meters, infrared imaging, and visual probing to verify whether materials have returned to safe limits. If wood remains structurally sound, they’ll document it for drying and monitoring. If gypsum has crumbled, separated, or wicked water above the cutoff line, they mark it for removal.
You stay informed because every decision affects repair scope, cost, and timeline. Clear labeling helps your team work together and keeps the mitigation plan organized. This step protects the structure before restoration begins.
Remove Irreparable Items
Once inspectors confirm what can’t dry safely, technicians remove irreparable items so the affected area can dry without hidden contamination or ongoing structural risk.
You should treat saturated drywall, swollen baseboards, and delaminated insulation as replacement candidates when recovery won’t restore strength or cleanliness.
Keep salvageable materials separated, and label each removed item for disposal or claim documentation. This step helps your crew protect the home, limit odor, and reduce the chance of mold spreading into nearby assemblies.
Cut out porous materials with visible wicking past the flood line.
Bag contaminated contents that trap sewage, silt, or debris.
Verify framing, subfloors, and finishes meet drying targets before reinstalling.
Prevent Mold After Pipe Damage
Start immediate drying as soon as the leak is contained by removing standing water, increasing airflow, and using dehumidifiers on all wet surfaces.
You should keep materials separated so moisture doesn’t spread into walls, flooring, or insulation.
After drying, sanitize all affected surfaces with an appropriate antimicrobial cleaner to reduce mold growth risk.
Immediate Drying Steps
Within the first few hours after a burst pipe, you need to remove standing water and begin aggressive drying to limit mold growth and secondary damage. You’re not alone in this step; every minute counts, and quick action protects your space and your routine.
Pull water out with pumps, wet vacuums, or mops until surfaces no longer pool.
Open windows if conditions allow, then place high-velocity fans to move air across floors, walls, and trim.
Run dehumidifiers continuously to lower indoor humidity and accelerate evaporation from hidden materials.
Check damp spots often and reposition equipment so airflow reaches corners, baseboards, and under furniture.
Remove rugs, lift cushions, and separate items to expose wet layers. Keep the area clear so drying can proceed without obstruction.
Sanitizing Affected Surfaces
After the visible water is removed and surfaces begin to dry, you should sanitize all affected areas to reduce the risk of mold and bacterial growth.
Choose a disinfectant labeled for water damage, and follow the manufacturer’s dilution and contact-time instructions exactly. Wipe hard, nonporous surfaces, then scrub seams, corners, and baseboards where residue hides.
Remove and discard porous materials that stayed soaked, since sanitizing won’t fully restore them. Use gloves, eye protection, and ventilation while you work.
If you share the space with others, keep traffic limited until surfaces are clean and dry. Inspect for discoloration or odor over the next 48 hours, because these signs can indicate hidden contamination.
When you sanitize thoroughly, you help protect your home and everyone in it.
Frequently Asked Questions
How Long Does Water Mitigation Usually Take?
Usually, you’ll need 1-3 days for initial water mitigation, but drying can take 3-7 days or longer. You should act fast, because you’ll reduce damage, prevent mold, and restore comfort sooner.
Does Insurance Cover Burst Pipe Water Mitigation?
Usually, yes: if you’ve got a covered sudden burst pipe loss. You should file promptly, document damage, and start mitigation. Your policy may exclude gradual leaks, so review deductibles, limits, and endorsements carefully.
Can I Stay in My Home During Mitigation?
Yes, you can stay if crews isolate the area, but if moisture, mold, or electrical hazards spread like wildfire, you’ll need to relocate. Follow the technician’s guidance, keep vents clear, and protect shared spaces.
What Equipment Do Mitigation Crews Use?
You’ll see crews use moisture meters, thermal cameras, extractors, air movers, dehumidifiers, HEPA vacuums, and antimicrobial sprayers. They’ll monitor readings, control humidity, and remove hidden water so you can feel secure during recovery.
How Much Does Burst Pipe Mitigation Cost?
Burst pipe mitigation usually costs you $1,500–$8,000, depending on water volume, damage depth, and drying time. You’ll pay more for mold control, demolition, or repairs, so get a detailed estimate fast.
Summary
When a pipe bursts, you need to act fast: stop the water, cut the power, document the loss, and call a mitigation team. In one job, a homeowner ignored a damp baseboard for 24 hours, and the hidden moisture spread like ink in blotting paper. That’s why you must remove standing water, dry concealed areas, and replace unsalvageable materials. If you stay systematic, you’ll limit structural damage and keep mold from taking hold.