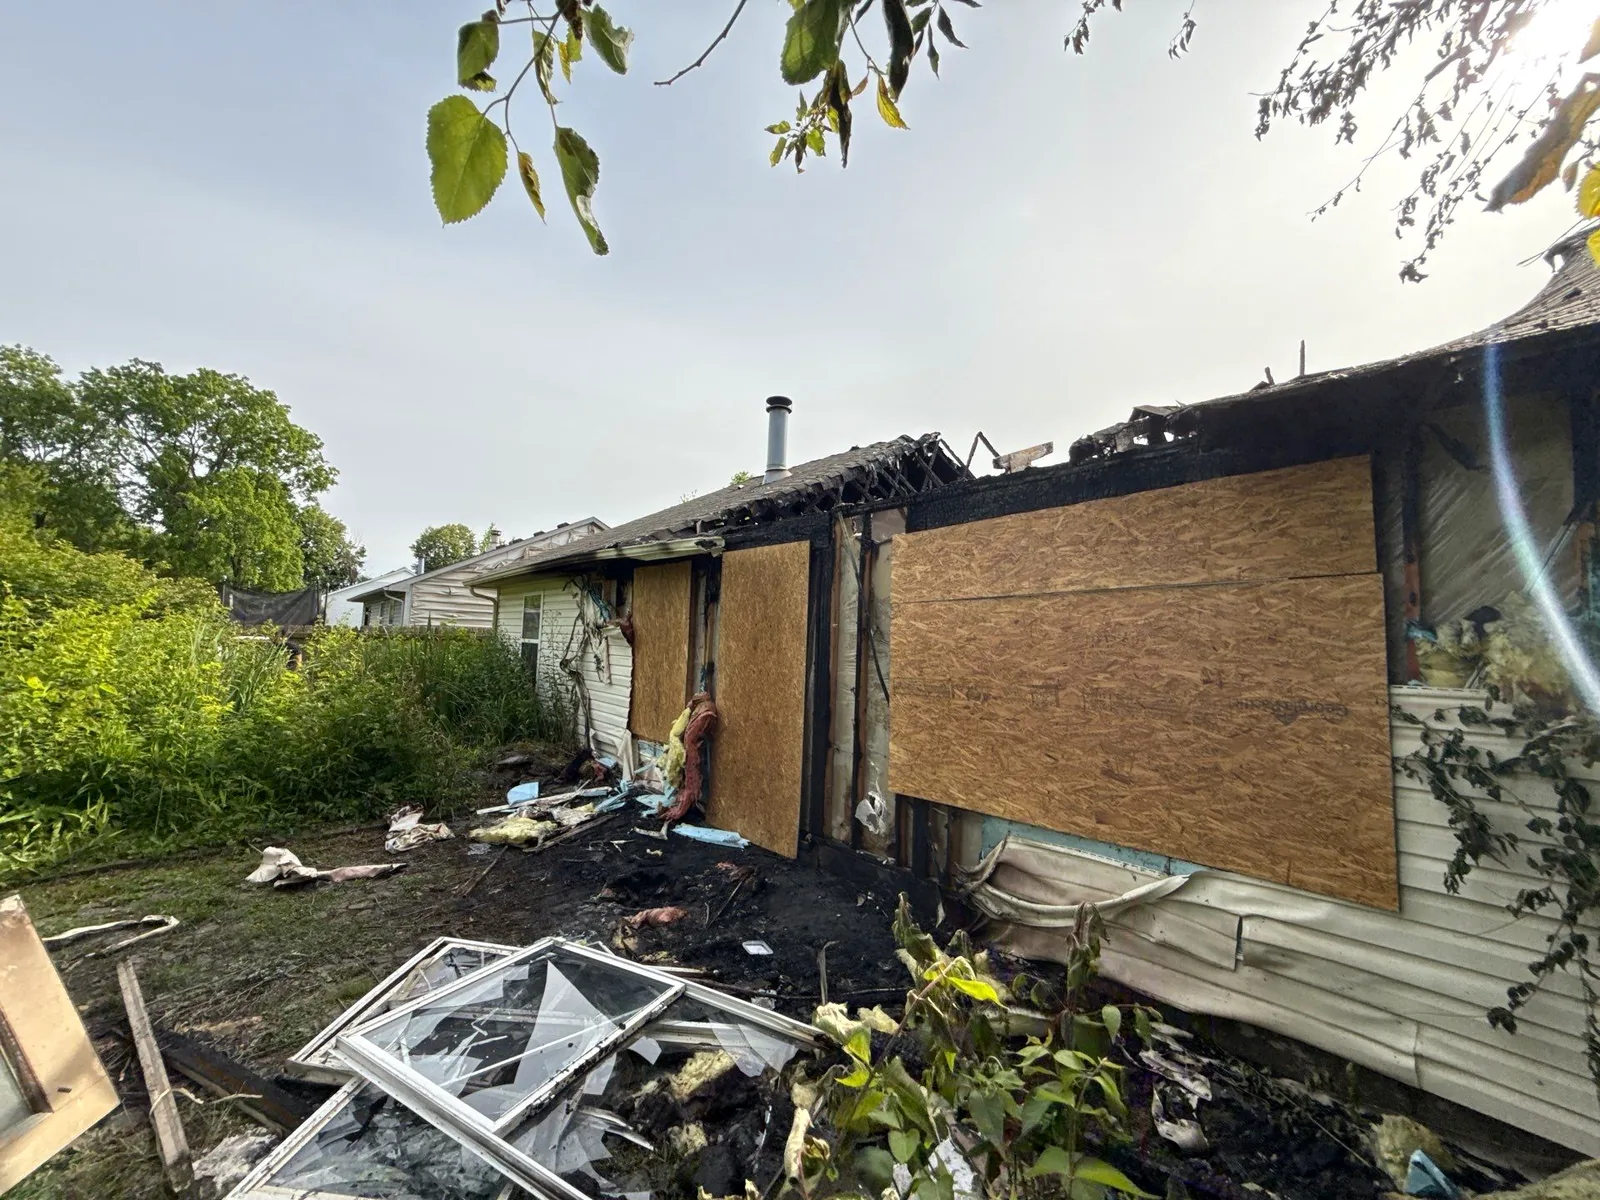
Smoke Damage Cleanup begins with a thorough inspection to identify soot, smoke residue, staining, and lingering odors throughout the affected property. Choosing the right cleaning methods for walls, ceilings, and other surfaces is essential to remove residue without causing additional damage. After cleaning, all areas should be thoroughly dried, and in some cases, odor-blocking primers or sealants may be needed to encapsulate remaining smoke residue and prevent persistent odors. A complete smoke cleanup process helps restore your property, improve indoor air quality, and reduce the risk of long-term staining and odor problems.
Key Takeaways
- Inspect walls and ceilings under strong light for soot, stains, bubbling paint, and oily residue.
- Remove loose soot first using a HEPA vacuum or dry-cleaning sponge to prevent smearing.
- Clean surfaces with warm water and a mild degreasing detergent, rinsing cloths often.
- Dry cleaned areas quickly, then use stain-blocking primer or smoke sealant if odors or stains remain.
- Act quickly, because delayed cleanup lets soot bond to porous materials and makes odors harder to remove.
How Smoke Damage Affects Walls and Ceilings
Smoke and soot can quickly cling to walls and ceilings, leaving behind residue that discolors surfaces and penetrates porous materials. You may notice paint dulling, film buildup, and lingering odor as combustion byproducts bond to drywall, plaster, and texture.
Heat can also weaken finishes, causing blistering, peeling, and minor surface distortion. If moisture from suppression efforts is present, it can spread contamination and increase staining.
Prompt smoke damage cleanup for walls and ceilings helps you limit adhesion, reduce corrosion on fixtures, and protect the integrity of the space you share. You’ll support faster recovery by addressing affected areas early and using methods that remove particulates without driving them deeper into the substrate.
Inspect Soot, Stains, and Hidden Damage
A careful inspection helps you map visible soot, identify stubborn stains, and detect hidden damage before cleanup begins.
You should examine walls and ceilings under strong light, noting powdery soot, oily residue, discoloration, and any bubbling paint or warped drywall. Run your hand lightly over surfaces to check for tacky films, but avoid pressing hard enough to spread residue.
Look closely at seams, corners, trim, vents, and fixtures, where smoke often settles and damage hides. Mark areas with heavier staining so you can prioritize cleanup and prevent missed spots.
Look closely at seams, corners, and fixtures where smoke settles, then mark heavily stained areas for focused cleanup.
If you notice persistent odor, soft spots, or cracking, treat those areas as signs of deeper contamination.
This careful assessment helps you and your team work efficiently, protect finishes, and restore a cleaner, healthier space.
Gather Smoke Cleanup Supplies
Before you clean smoke-damaged walls and ceilings, gather the essential tools: microfiber cloths, sponges, buckets, and a soot-safe cleaning solution.
You should also wear protective safety gear, including gloves, goggles, and a respirator, to reduce exposure to fine particles and residue.
Having these supplies ready lets you work efficiently and helps prevent further surface damage.
Essential Cleaning Tools
To clean smoke-damaged walls and ceilings effectively, you’ll need the right supplies on hand before you start scrubbing. Gather a bucket, warm water, a degreasing detergent, and a smoke-cleaning solution rated for painted surfaces.
Keep microfiber cloths, nonabrasive sponges, soft-bristle brushes, and lint-free towels within reach so you can lift soot without spreading it. Use a HEPA vacuum with a brush attachment to remove loose residue from trim and corners before wet cleaning.
A stable step ladder helps you access high areas safely and maintain steady pressure. Have clean water ready for rinsing surfaces and changing solution as it turns dark.
With these tools organized, you can work efficiently, protect finish quality, and restore a cleaner, more comfortable space.
Protective Safety Gear
Safety gear protects you from soot, dust, and cleaning chemicals while you gather smoke cleanup supplies. You should wear nitrile gloves, safety goggles, and a respirator rated for fine particulates to limit inhalation and skin contact.
If residue is heavy, add a disposable coverall and shoe covers so you don’t track contaminants through clean areas. Choose gear that fits securely; loose gaps reduce protection and invite exposure.
Keep a sealed waste bag nearby for used wipes and filters, and replace damp or damaged items immediately. Before you start, inspect each piece for tears, cracks, or poor seals.
When you suit up correctly, you protect your health and join the cleanup process with confidence, control, and the right technical readiness.
Clean Walls and Ceilings Safely
Start by removing loose soot from walls and ceilings with a dry-cleaning sponge or vacuum equipped with a soft brush attachment, working from the top down to prevent streaking and spreading residue.
Next, wash the surface with a mild detergent solution and a microfiber cloth, using light, controlled passes. You should test a small hidden area first to confirm the finish won’t lift or dull.
Rinse the cloth often to avoid redepositing soot.
Change cleaning water when it turns gray.
Dry each section promptly with a clean towel.
If you’re working with a team, keep one person on cleaning and another on inspection so no area gets missed.
This approach helps you restore a clean, consistent surface safely and confidently.
Remove Smoke Odors From Painted Surfaces
Once the soot is gone, you’ll need to neutralize lingering smoke odors on painted walls and ceilings before they set into the finish. You can improve results by washing the surface with a mild alkaline cleaner or a smoke-specific deodorizing solution, then wiping with clean water.
Work in sections, using a microfiber cloth or soft sponge to lift odor-bearing residue without abrading the paint. Keep ventilation strong so airborne compounds dissipate instead of reabsorbing.
If the room still smells smoky, repeat the cleaning after the surface dries fully. You should also inspect trim, corners, and ceiling edges, where odor often hides.
Use Primer or Sealant When Needed
If smoke stains or odors still show through after cleaning, you may need to apply a stain-blocking primer or smoke-sealing sealant before repainting.
You’ll get better adhesion and a more uniform finish when you choose the right product for the surface. Apply it only after the wall or ceiling is dry and free of residue. Follow the manufacturer’s coverage and recoat times to keep the coating performing as intended.
Select a primer rated for smoke, soot, or tannin bleed.
Use a sealant where odor suppression needs extra control.
Test a small area first to confirm hide and compatibility.
With careful application, you’ll join other homeowners who restore surfaces cleanly, professionally, and with confidence.
Prevent Smoke Damage From Becoming Permanent
You should remove soot immediately after exposure, because residue can etch walls and ceilings and make staining permanent.
When you clean porous surfaces, you’ll need to seal them if contamination has penetrated the material and left odor or discoloration.
If the damage is extensive, you should contact professional restoration services quickly to limit absorption and improve recovery outcomes.
Immediate Soot Removal
Immediate soot removal is critical because fresh smoke residue bonds quickly to walls and ceilings, making cleanup harder and increasing the risk of permanent staining and odor retention.
You can reduce damage fast when you act with control and consistency. Use a dry soot sponge or microfiber cloth first, then vacuum loose particles with a HEPA unit to keep debris from spreading.
Inspect surfaces for loose soot.
Clean from top to bottom in straight passes.
Replace cloths or sponges when they load up.
Work in small sections so you maintain accuracy and avoid re-depositing residue.
If you stay methodical, you’ll protect finishes, limit odor, and help your space feel safe and restored again.
Seal Porous Surfaces
Once soot has been lifted, seal porous walls and ceilings quickly to block residual smoke particles from soaking deeper into the substrate.
You’ll want a stain-blocking primer or smoke-sealing encapsulant that penetrates drywall, plaster, or acoustic texture and locks down microscopic residue.
Apply it only after the surface is clean, dry, and free of loose debris, then use even coverage with a roller, brush, or sprayer as the material specifies.
This step reduces odor release, limits discoloration bleed-through, and stabilizes the surface for finish paint.
When you seal correctly, you protect your space and support a cleaner, healthier result.
In a well-cared-for home or workplace, this isn’t cosmetic alone; it’s a practical barrier that helps your team and family move forward with confidence.
Professional Restoration Timing
If soot and smoke residue stay on walls and ceilings too long, they can bond with paint, etch finishes, and leave odors that become difficult to remove.
You need professional restoration quickly because time drives chemical degradation and hidden contamination into seams, corners, and porous coatings. A trained team uses measured methods, so you’ll feel confident your space is handled correctly.
Inspect within hours to map affected surfaces and moisture.
Remove loose soot, then apply cleaning agents matched to the substrate.
Seal remaining staining and odor pathways before they set.
When you act fast, you protect finishes, indoor air quality, and your property value.
Prompt response also helps your household or business get back to normal with less disruption and stronger results.
Frequently Asked Questions
How Soon Should Smoke Damage Be Cleaned After a Fire?
You should clean smoke damage within 24 to 48 hours after a fire. You’ll reduce soot staining, corrosion, and odor if you act fast, and you’ll protect walls and ceilings from permanent damage.
Can Smoke Damage Spread to Other Rooms?
Yes, smoke damage can spread to other rooms through airflow and porous surfaces. You might think it stays localized, but it doesn’t; soot and odors travel quickly, so you’ll need prompt, room-by-room cleanup.
Is Professional Restoration Always Necessary for Smoke-Damaged Walls?
No, you don’t always need professional restoration for smoke-damaged walls, but you should assess soot depth, odor, and surface material. You can clean minor damage yourself; severe contamination, staining, or porous finishes need expert treatment.
What Health Risks Come From Lingering Soot Particles Indoors?
You’ll inhale irritation, trigger asthma, and invite headaches, coughing, and eye inflammation, because soot politely pretends to be dust while carrying toxins. You also risk long-term respiratory stress and worsened allergies indoors.
How Do You Know if Drywall Must Be Replaced?
You’ll know drywall must be replaced if soot penetrates deeply, odors persist after cleaning, paint blisters, or the board feels soft, warped, or crumbling. You shouldn’t ignore staining that returns.
Summary
When you’ve finished cleaning, don’t assume the job is over. Smoke residue can hide in microscopic pores, and odors can return if you miss even one stained area. Check walls and ceilings again under bright light, then test for lingering smell after the surface dries. If discoloration still shows, seal it before it spreads deeper. Act quickly, because every hour you wait can make restoration harder, and the damage may already be setting in.