When you respond to water damage quickly, you limit the moisture mold needs to take hold. You extract standing water, dry materials, and control humidity before hidden dampness spreads through walls, flooring, and insulation. If you miss even small pockets of moisture, mold can start in less than 24 hours. The real challenge is knowing where water lingers, and that’s where effective mitigation makes all the difference.
Key Takeaways
- Water mitigation removes standing water quickly, reducing moisture needed for mold to start growing.
- Fast drying lowers humidity and stops spores from activating on damp surfaces.
- Extracting hidden moisture from walls, floors, and cavities prevents mold in unseen areas.
- Isolating affected areas limits moisture spread and protects clean spaces from contamination.
- Monitoring moisture levels ensures materials are fully dry before mold can return.
How Water Mitigation Prevents Mold
Water mitigation prevents mold by quickly removing excess moisture before it can support fungal growth. You limit spore activation when you extract standing water, dry porous materials, and reduce humidity in affected rooms.
This controlled response explains how water mitigation prevents mold growth: it interrupts the conditions mold needs to colonize drywall, wood, insulation, and flooring. You also lower the risk of hidden contamination by addressing moisture behind walls and under surfaces, where growth often begins unnoticed.
When you act fast, you protect indoor air quality and keep your property safer for everyone who lives or works there. By staying alert and using a disciplined mitigation plan, you join a community of property owners who take prevention seriously and avoid costly remediation later.
What Water Mitigation Does in the First 24 Hours
During the first 24 hours, you must stop moisture from spreading to unaffected materials and spaces.
You also need to remove standing water quickly to reduce saturation and contamination risk.
Then you can begin controlled drying to lower humidity and limit mold growth.
Stop Moisture Spread
Within the first 24 hours, mitigation teams act fast to stop moisture from spreading into adjacent materials and concealed spaces.
You’ll see them isolate affected areas, protect dry finishes, and create controlled airflow paths that limit wicking through drywall, trim, insulation, and subflooring.
They seal openings, monitor humidity, and use targeted drying strategies so moisture doesn’t migrate into wall cavities or underlayment.
This early containment helps you preserve more of your structure and reduces the chance that trapped dampness supports mold growth.
When you respond quickly, you stay ahead of hidden contamination and keep your property on the safest recovery path.
You’re not just drying a room; you’re protecting the whole building envelope with coordinated, proven mitigation steps that your team can trust.
Remove Standing Water
First, mitigation crews remove standing water to prevent further absorption into flooring, drywall, and framing. You’ll usually see pumps, wet vacuums, or extraction tools used to pull water from carpets, subfloors, and low spots.
This step matters because pooled water keeps feeding moisture into building materials and raises the chance of mold growth. By taking out the bulk water quickly, you reduce the load on your structure and limit hidden contamination.
Technicians also check corners, under cabinets, and around baseboards where water can linger unnoticed. When you act fast, you protect your home’s integrity and support a cleaner recovery process.
You’re not just drying a space; you’re helping your property stay safe, stable, and ready for the next phase.
Begin Drying Process
Once the standing water is gone, mitigation crews immediately begin drying the affected areas to stop moisture from soaking deeper into materials.
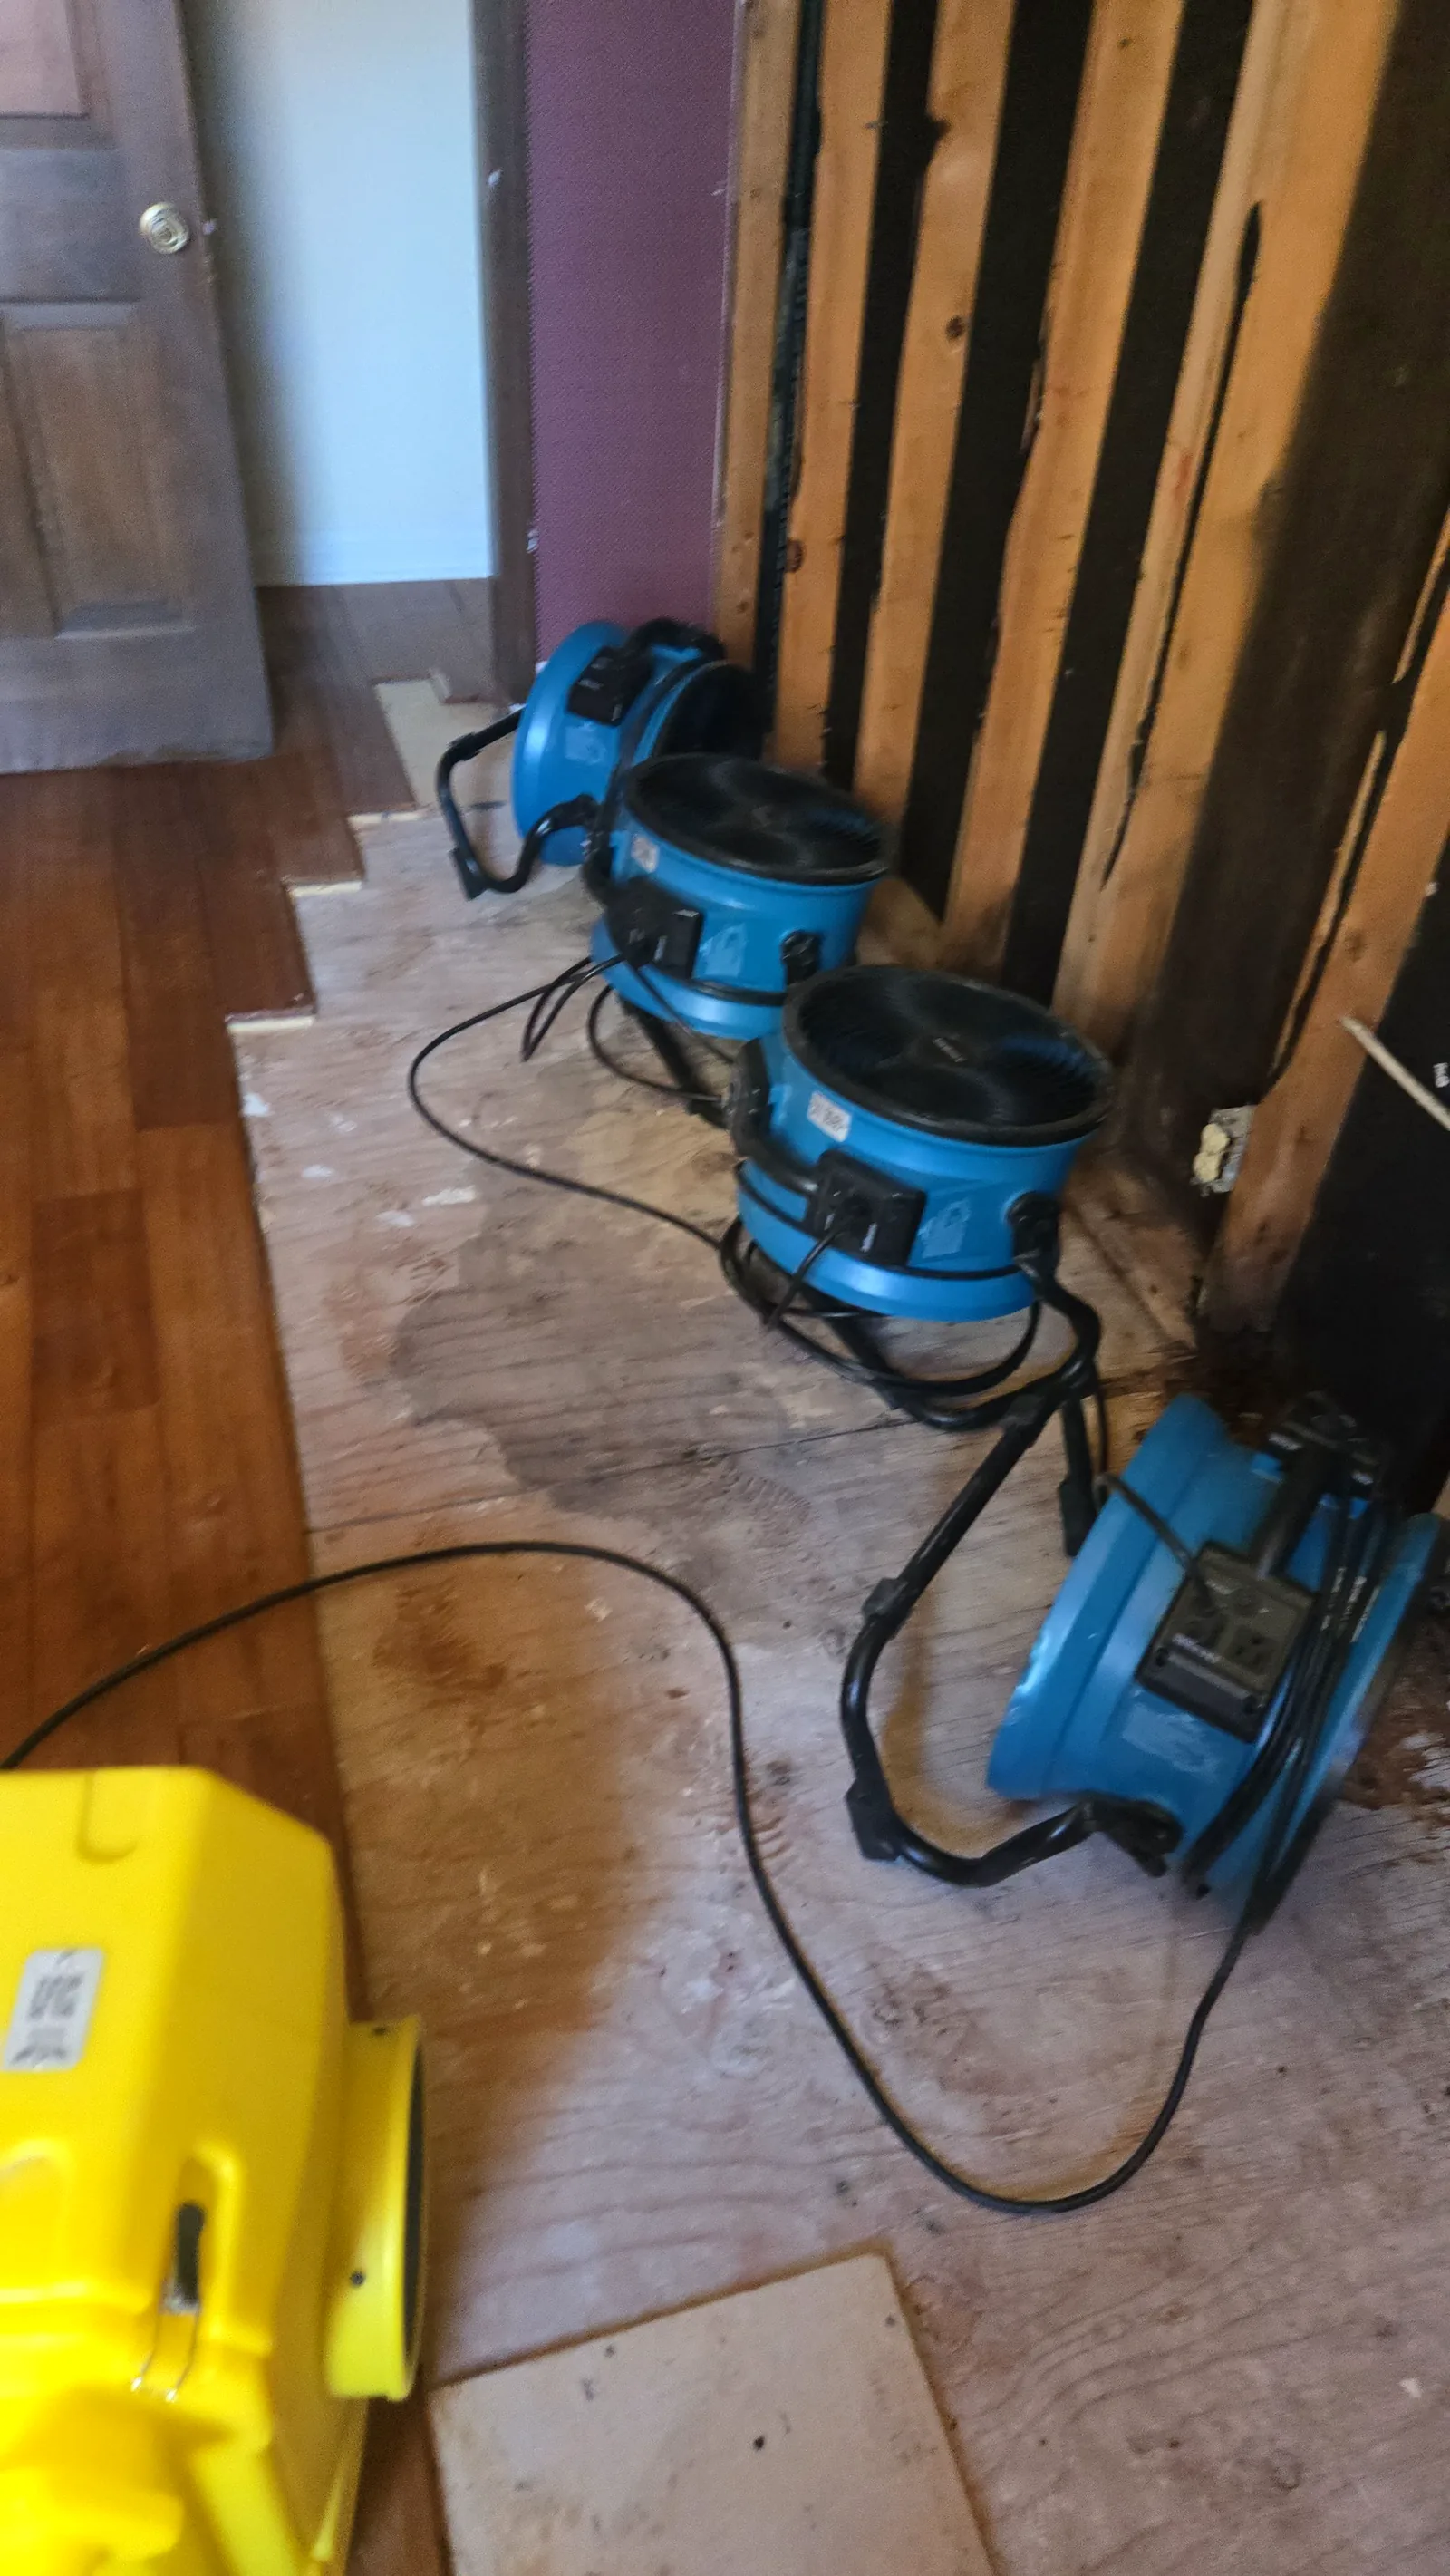
You’ll see air movers and dehumidifiers placed to create targeted airflow and pull vapor from walls, floors, and contents. This fast response helps you stay ahead of mold and protects the space you share with family or coworkers.
Measure humidity and material moisture.
Position equipment for maximum evaporation.
Monitor progress and adjust airflow.
Remove lingering dampness before spores spread.
How Moisture Spreads After Water Damage
After water damage, moisture doesn’t stay confined to the visible wet area; it spreads quickly through porous materials, wall cavities, subfloors, and insulation by capillary action, gravity, and air movement.
After water damage, moisture spreads beyond the visible wet area into hidden cavities and porous materials.
You may see dry surfaces while hidden layers remain saturated, so you need to check beyond what’s obvious. Drywall paper, wood framing, carpet pads, and concrete all can transport water laterally and vertically, creating wider affected zones than you expect.
HVAC airflow can also redistribute humidity into adjacent rooms, making moisture harder to isolate. When you understand this movement, you can join a more coordinated drying effort, target affected assemblies, and reduce missed pockets of dampness.
Careful monitoring helps you track where moisture has traveled and where it’s still held.
Why Mold Starts Growing So Fast
When moisture lingers in materials, you create the conditions mold needs for rapid growth.
Hidden dampness in walls, flooring, and insulation can spread quickly and stay undetected, which lets colonies establish before you notice visible damage.
That’s why fast water mitigation matters: it removes moisture early and limits contamination.
Moisture Triggers Rapid Growth
Moisture creates the conditions mold needs to spread quickly because it activates dormant spores and supports fast colony growth on porous materials. When you leave damp surfaces untreated, mold can begin colonizing within 24 to 48 hours, and that timeline can feel alarming.
You can reduce that risk by acting fast and restoring dry conditions.
You interrupt spore activation.
You limit enzyme-driven tissue breakdown.
You protect indoor air quality.
You help your home stay a safe, shared space.
Water mitigation works because it removes the moisture mold depends on for metabolism and reproduction. When you dry affected materials promptly, you cut off the growth cycle before colonies establish, helping you and your household regain control with confidence.
Hidden Dampness Spreads Fast
Hidden dampness often spreads faster than visible water because it stays trapped inside walls, floors, insulation, and other porous materials where airflow is limited.
You may think the surface looks dry, but moisture can keep moving through capillaries and seams, feeding mold in concealed spaces. Warm temperatures, organic dust, and steady humidity let spores activate within 24 to 48 hours.
When you respond quickly, you protect your home and your people from hidden contamination.
Professionals use moisture meters, thermal imaging, and targeted drying to find wet zones you can’t see. They remove trapped water, dehumidify affected areas, and isolate materials before colonization expands.
Dry Hidden Areas Thoroughly
Drying out concealed spaces is essential because water trapped behind walls, under flooring, or inside cabinets can keep mold active long after surface areas look dry.
You need directed airflow, dehumidification, and moisture monitoring to restore safe conditions. Focus on the places your eye can’t check easily, because those are the spots that threaten your home’s stability and your peace of mind.
Pull moisture from wall cavities.
Dry subfloors and trim edges.
Check cabinetry and toe kicks.
Verify dryness with a meter.
When you verify each hidden zone, you protect your living space and help your household stay comfortable together.
Don’t trust appearances; trust measurements. Thorough drying breaks the conditions mold needs, so your cleanup stays effective and your home feels like yours again.
Safely Remove Contaminated Materials
Once materials have absorbed contamination beyond recovery, you need to remove them carefully so mold doesn’t spread to clean areas. You should bag porous items, like drywall, insulation, and carpet padding, before you move them, and you should seal each bag immediately.
Use gloves, eye protection, and a fitted respirator if dust or debris can release spores. Cut damaged sections in place to limit handling, then carry them through the shortest path possible. Keep salvageable belongings separated from waste so your team can maintain a clean zone.
If materials are heavy or saturated, get help to avoid tearing and dropping fragments. After removal, clean exposed framing and subfloors, then inspect nearby surfaces for residue.
When you work this way, you protect your space and support everyone helping restore it.
How Water Mitigation Protects Indoor Air
When you mitigate water quickly, you reduce airborne spore release by limiting mold growth on damp surfaces.
You also control the moisture source, which stops contaminants from spreading through indoor air.
This process helps keep your HVAC system and occupied spaces cleaner and safer.
Airborne Spore Reduction
By rapidly removing standing water and lowering indoor humidity, water mitigation reduces the conditions that let mold release and spread airborne spores.
You protect your shared indoor environment by interrupting this dispersal process before concentrations rise.
Drying equipment, filtration, and dehumidification work together to cut particulate load and keep spores from recirculating through occupied spaces.
That means you and your household breathe cleaner air, with less irritation and fewer exposure concerns.
You limit spore movement.
You lower airborne contamination.
You support healthier ventilation.
You restore confidence at home.
When you act quickly, you join a safer, cleaner recovery process.
Precise mitigation doesn’t just dry surfaces; it helps stabilize the air you live in and reduces the chance that hidden mold becomes a shared problem.
Moisture Source Control
Stopping the moisture source is the most effective way to protect indoor air during water mitigation, because mold needs persistent dampness to grow and spread. You should identify leaks, burst pipes, roof intrusion, or condensate failures, then shut them down immediately.
Your team can isolate damaged zones, remove wet materials, and deploy dehumidifiers and air movers to bring humidity below growth thresholds. If moisture keeps entering walls, floors, or HVAC components, spores can colonize hidden surfaces and lower air quality.
Using Dehumidifiers and Air Movers
Once standing water is removed, dehumidifiers and air movers help you dry affected materials quickly and reduce the moisture that mold needs to develop.
You create a safer environment by moving humid air out and circulating drier air across walls, flooring, and contents. Set equipment to match room size, damage level, and airflow paths for steady evaporation.
You lower relative humidity.
You speed material drying.
You protect surfaces from lingering dampness.
You support a healthier recovery space.
Use both tools together, and you’ll feel confident that your crew, family, or team is working from the same clear goal: restoring dry, stable conditions.
Use both tools together to restore dry, stable conditions with confidence and clarity.
Monitor progress with moisture readings, and keep equipment running until materials reach acceptable levels for your space.
Common Mistakes That Let Mold Return
Mold often returns when you miss hidden moisture, dry too slowly, or shut down equipment before materials reach safe levels.
You also create risk when you skip containment, leave wet insulation in place, or ignore porous materials that can’t rebound after saturation.
If you pack belongings back too soon, you trap humidity and feed spores.
Don’t rely on surface dryness alone; wet subfloors, wall cavities, and framing can stay active after visible water is gone.
You should keep airflow, dehumidification, and monitoring consistent until moisture readings confirm safe conditions.
When you document each step and stay disciplined, you protect your home and the people in it.
Careful mitigation helps you keep the environment stable, clean, and confidently dry.
Signs Your Home Still Has Moisture
How can you tell if moisture is still present after mitigation? You can confirm it through visible and measured signs that affect your home and your peace of mind. Check for these indicators:
Darkened drywall, swollen trim, or peeling paint
A persistent musty odor, especially in enclosed rooms
Condensation on windows, pipes, or cooled surfaces
Elevated readings on a moisture meter in walls or floors
If you notice any of these, the building envelope may still be holding water. You belong to a group of homeowners who act early, so inspect baseboards, subfloors, and attic spaces carefully.
Use a hygrometer to compare room humidity with normal levels. When moisture lingers, mold can start fast, but your prompt response keeps contamination from spreading and protects your home’s structure.
Frequently Asked Questions
How Much Does Water Mitigation Usually Cost?
You’ll usually pay $1,000 to $4,000 for water mitigation, though minor jobs can cost less and extensive damage more. You should get an onsite assessment, since water source, saturation, and drying needs drive pricing.
Can I Stay in My Home During Mitigation?
Yes, you can sometimes stay home during mitigation if the affected area’s isolated, but you’ll need to avoid active work zones, manage noise, and follow safety guidance. Your technician’ll confirm air quality, access limits, and temporary relocation needs.
How Long Does the Mitigation Process Take?
You’ll usually need 2–5 days for mitigation, but severe damage can take longer. You’ll get faster results when crews remove standing water, dry materials, and monitor moisture levels until everything’s stable and safe.
Does Insurance Cover Water Mitigation Services?
Yes, you may have coverage if your policy covers sudden, accidental water damage. You’ll need to document losses, contact your insurer quickly, and use an approved mitigation contractor to support your claim.
Who Should I Call First After Water Damage?
You should call a licensed water mitigation company first, then your insurer. They’ll assess damage, extract water, dry materials, and help you protect your home before mold starts spreading and costly repairs escalate.
Summary
Water mitigation helps you stop mold before it takes root. In the first 24 hours, you remove standing water, lower humidity, and dry hidden materials so moisture does not linger like a silent fuse. When you use dehumidifiers, air movers, and careful monitoring, you cut off the conditions mold needs to grow. If you stay alert for dampness, you protect your home’s structure, indoor air, and long-term health.